Have you ever handed over a cherished piece of jewelry for repair or engraving, only to feel that flicker of doubt—wondering if it will ever look the same or if the craftsmanship will truly last? I remember my first experience with a custom engraving. I was excited but also painfully aware of how a mistake could ruin a sentimental piece. That moment was a real eye-opener, revealing just how crucial expert strategies are to boost confidence and ensure lasting value.
Why Mastering Repair and Engraving Matters More Than Ever
In my journey through jewelry repair and engraving, I’ve learned that these skills aren’t just about fixing or decorating. They’re about building trust—not just in yourself, but in your clients and loved ones. When done right, expert repair and engraving can transform ordinary jewelry into personal masterpieces. But without the right knowledge, it’s easy to make mistakes that can diminish value or damage the piece. According to recent industry insights, precision in repair and engraving significantly impacts the long-term trust and value of jewelry (source).
Have you faced a time when a repair or engraving didn’t turn out as expected? If so, you’re not alone. Many enthusiasts and professionals stumble early on, often because they overlook the importance of strategic techniques. But don’t worry—today, I’ll share proven strategies to elevate your skills, inspire confidence, and ensure your jewelry projects last a lifetime.
Is It Really Worth the Hype? The Real Deal About Expert Repair and Engraving
Early in my career, I made a costly mistake—rushing through a delicate engraving without proper tools or understanding. That slip-up taught me a vital lesson: the difference between amateur results and professional craftsmanship lies in the details. Investing in expert techniques can seem daunting or unnecessary, but the payoff is undeniable. Proper repair and engraving strategies can boost the value and trustworthiness of your jewelry, making every piece a testament to quality. Curious about how to achieve this? Check out our comprehensive guide to custom engraving techniques for practical tips.
So, if you’ve ever wondered whether you’re maximizing your jewelry’s potential or worried about making costly mistakes, stay with me. We’re about to dive into actionable steps that will turn your approach into a trusted craft—one that guarantees lasting beauty and confidence for every piece you touch.
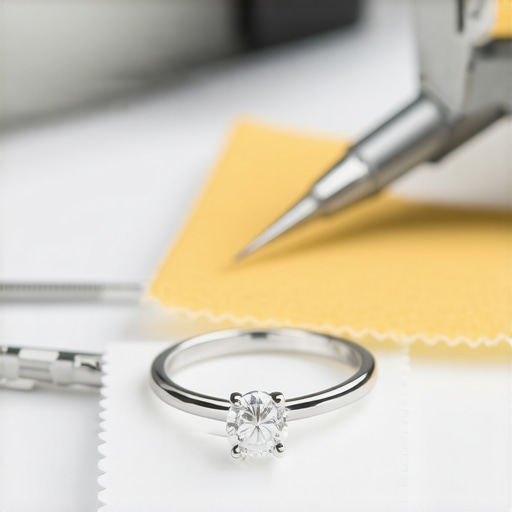
Prepare Your Workspace and Tools for Precision
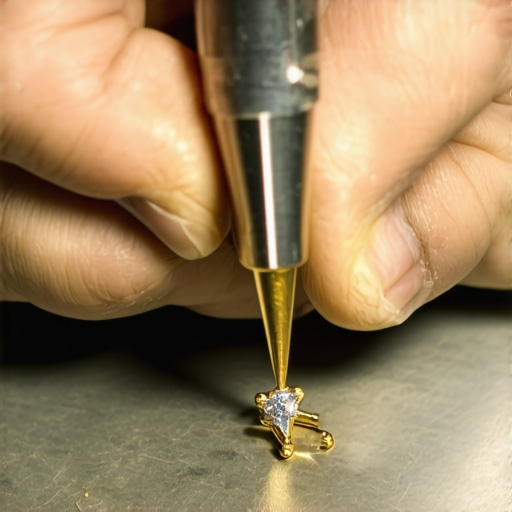
Think of your workspace as a surgeon’s operating room—clean, organized, and equipped with the right instruments. I recall a time when I was attempting a delicate engraving and realized I had overlooked my magnifying glasses. The result was a blurry design that needed to be redone. To avoid this, always set up with a well-lit area, magnification tools, and high-quality engraving or repair equipment. This foundation ensures accuracy and reduces mistakes, much like a chef preparing ingredients before cooking.
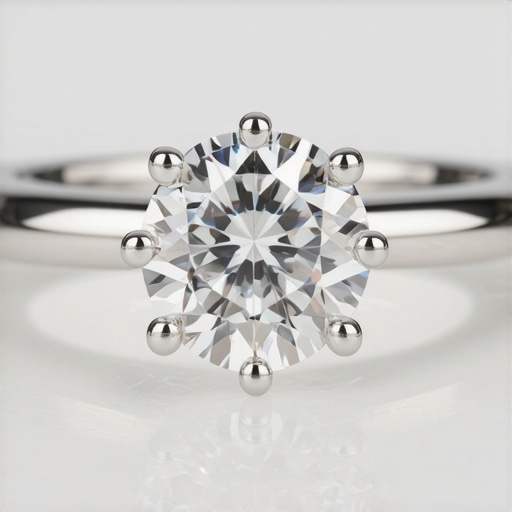
Choose the Right Materials and Techniques
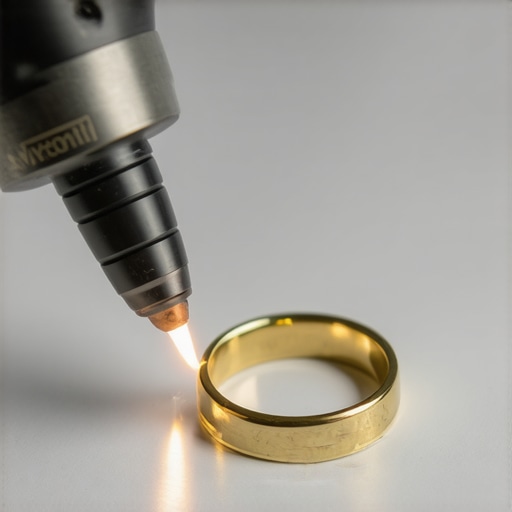
Select materials that suit your project’s needs. For instance, softer metals like silver are easier for beginners, but harder metals require more advanced techniques. I once tried engraving a platinum ring without proper tools, leading to uneven lines. The lesson? Use the appropriate burrs, grips, and settings for the metal you’re working on. Research and practice different techniques—such as laser engraving for intricate details or soldering for repairs—to expand your skill set. For comprehensive guidance, check out this guide to custom engraving techniques.
Master the Art of Hand Positioning and Control
Imagine trying to write with a shaky hand—your message becomes unreadable. The same applies to jewelry engraving and repair. I remember practicing holding my engraving tool steady against a rotating piece. I found that anchoring my hand on a stable surface and maintaining a consistent grip minimized wobbling. Use micro-movements and controlled pressure to achieve clean lines. Think of your hand as a brush—steady and deliberate movements create better results. Practice makes perfect, so dedicate time to develop your control skills.
Implement Step-by-Step Techniques for Better Results
Plan Your Design Carefully
Before starting, sketch your design on paper or directly on the jewelry with a fine marker. This acts as a roadmap, preventing costly mistakes. I once skipped this step and ended up with an uneven inscription, which I had to redo entirely. Use rulers or stencils for precision and ensure your design fits the space.
Secure the Jewelry Properly
Clamping or holding jewelry securely prevents slips. I used a jeweler’s vise to stabilize a pendant, which made engraving much easier. Avoid holding pieces in your hand for delicate work, as even slight movements can ruin details. Proper securing is as vital as the technique itself.
Practice Layered and Light Strokes
Instead of pressing hard at once, apply light, consistent strokes, gradually deepening the engraving. This approach provides more control and cleaner lines. I once tried to etch a complex pattern in one go, resulting in uneven depths. Learning to build up the design with multiple passes leads to a more professional look and easier corrections.
Verify and Polish Your Work for Lasting Confidence
After completing, examine your work under magnification. Smooth out any rough edges with fine files or polishing tools. This not only enhances the appearance but also maintains the jewelry’s integrity. I remember polishing a ring and discovering tiny burrs that could cause discomfort. Proper finishing techniques are key to ensuring your piece is both beautiful and durable. To refine your skills further, explore this resource on expert engraving strategies.
Build a Routine That Reinforces Confidence
Consistency is your best friend. Set aside regular practice sessions, keep detailed notes, and analyze your results. I kept a journal of my projects, noting what worked and what didn’t, which accelerated my learning curve. Over time, your skills will become second nature, boosting your confidence and trust in your craftsmanship.
Remember, mastery in repair and engraving is a journey of continual learning and refinement. Every mistake is a step closer to excellence, so stay patient and persistent.
Many enthusiasts and even some professionals believe they fully grasp the essentials of jewelry repair and engraving, but in reality, there are subtle pitfalls and misconceptions that can undermine your results. Let’s dig deeper into what most people get wrong about these intricate crafts, revealing hidden nuances that can elevate your mastery and avoid costly mistakes.
Why Speed Is Not Your Friend in Precision Work
Contrary to popular belief, rushing through repair or engraving tasks often leads to inferior results. The myth that faster work equates to better productivity is tempting, but in my experience, meticulous, deliberate actions produce lasting quality. For instance, applying excessive pressure or hurriedly moving the engraving tool can cause uneven lines or even damage the metal. Industry experts emphasize that patience and controlled movements are essential for precision, which is why mastering your technique and controlling your pace is a key to professional results (source).
Beware of the Overconfidence Trap
Many beginners fall into the trap of overestimating their skills after a few successful projects. This can lead to skipping critical steps like proper cleaning, securing the jewelry, or testing tools. Overconfidence often results in overlooked details, which can cause irreversible damage or subpar engravings. Remember, even experienced jewelers continually refine their techniques—never stop learning and verifying your work. For advanced tips, explore this comprehensive guide.
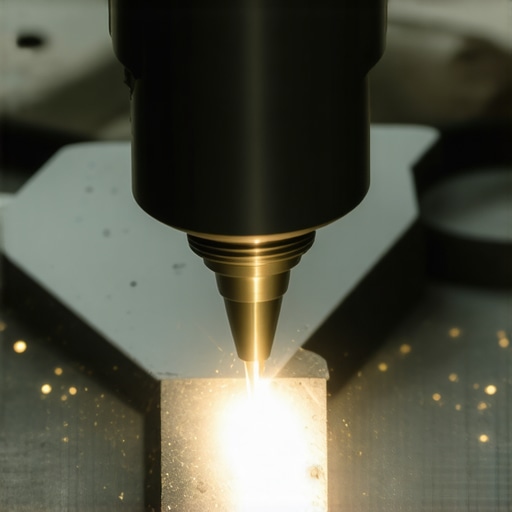
Is Laser Engraving Always Better?
Many believe laser engraving is a shortcut to perfection, but this isn’t always true. While laser engraving offers high precision for complex designs, it can lack the handcrafted charm that hand engraving provides. Furthermore, laser techniques may not be suitable for all metals or projects, especially when a more personal touch is desired. The hidden nuance here is that understanding the specific benefits and limitations of each method is crucial. For example, hand engraving allows for subtle artistic variations that machines cannot replicate, adding sentimental value. To deepen your understanding of selecting the right technique, visit this resource.
Have you ever fallen into this trap? Let me know in the comments. Recognizing these misconceptions and nuances is vital for building lasting trust and confidence in your jewelry craftsmanship. Remember, mastery is a journey that involves continual learning, precise execution, and an understanding of the subtle differences that make all the difference in your work.
Investing in the Right Equipment for Long-Term Success
Having the proper tools is fundamental to maintaining precision and quality in jewelry repair and engraving. I personally rely on a high-quality flex shaft rotary tool, such as the Foredom series, because it offers unmatched control and versatility for delicate work. Its variable speed control allows me to switch seamlessly between fine engraving and heavier polishing tasks, which is essential for different metals and designs. For a consistent finish, investing in a set of carbide and diamond burrs is crucial—they last longer and provide cleaner cuts compared to cheaper alternatives. Regular maintenance of these tools, like cleaning and lubricating the rotary shaft, ensures they perform reliably over time and prevents unexpected breakdowns.
The Power of Proper Lighting and Magnification
Clear visibility is non-negotiable. I recommend using a magnification lamp with adjustable arms, such as the OttLite Magnifier Desk Lamp, because it combines bright LED illumination with a 5x magnification lens. This setup minimizes eye strain and enhances detail recognition, which is vital when working on intricate engravings or repair joints. Proper lighting also helps you spot imperfections early, saving time and effort in polishing or reworking a piece. To keep your workspace efficient, consider an adjustable worktable that can be raised or lowered, allowing for comfortable ergonomics during long sessions.
Tools I Recommend for Precision and Reliability
Beyond basic tools, specific equipment can significantly impact your results. A digital caliper with high accuracy (±0.01mm) ensures precise measurements for resizing or fitting components. I use the Mitutoyo digital caliper because it’s durable and easy to calibrate, which maintains measurement consistency over time. For cleaning, a ultrasonic jewelry cleaner is indispensable—gentle yet thorough, it removes debris from tiny crevices and prepares the jewelry for engraving or polishing. I prefer models with adjustable timers and temperature controls for different cleaning needs, extending the lifespan of your jewelry.
Predicting Future Trends in Jewelry Maintenance
As technology advances, expect more integration of digital tools like 3D scanning and laser calibration systems. These innovations will make repairs more precise and faster, reducing the manual guesswork. Staying ahead will involve embracing these tools while maintaining traditional craftsmanship skills, especially for personalized or artistic projects.
How do I keep my tools in top shape over time?
Consistent maintenance routines are key. Regularly cleaning burrs, replacing worn-out parts, and calibrating measurement devices ensure longevity and precision. Lubricate rotary tools as per manufacturer instructions and store tools in a dry, organized space to prevent rust and damage. I also keep a maintenance log for each tool, noting service dates and replacements, which helps avoid unexpected failures and prolongs your investment.
Finally, don’t overlook the importance of training. Even the best tools require skillful handling. Invest time in learning proper techniques for each piece of equipment, and you’ll see a noticeable improvement in your craftsmanship and confidence. For advanced tips on maintaining jewelry tools, explore this resource.
Ready to elevate your jewelry repair game? Start by inspecting your current toolkit and scheduling regular maintenance. Remember, well-maintained tools are the backbone of lasting trust and exceptional craftsmanship in jewelry making.
The Hardest Lesson I Learned About Jewelry Craftsmanship
One of the most valuable lessons I discovered was the importance of patience over speed. Rushing through repair or engraving can lead to costly mistakes that undermine trust and value. Taking the time to set up your workspace properly and practicing deliberate, controlled movements can drastically improve your results.
My Essential Toolkit for Jewelry Repair and Engraving
Investing in high-quality tools like a Foredom rotary tool, a set of diamond burrs, and an adjustable magnification lamp has transformed my work. These tools not only enhance precision but also boost confidence, knowing that I’m equipped for both delicate details and heavier repairs. Regular maintenance of your tools is just as crucial to ensure long-term performance.
Your Turn to Transform Your Jewelry Skills
Now that you know some of the core secrets behind expert repair and engraving, it’s time to put these tips into action. Remember, mastery is a journey, and every project is a chance to refine your craft. Are you ready to elevate your jewelry confidence and trust? Share your experiences or questions below—I’d love to hear about your progress!

![5 Hidden Signs Your Ring Prongs Are Failing [2026 Checklist]](https://jewelryfixpro.com/wp-content/uploads/2026/02/5-Hidden-Signs-Your-Ring-Prongs-Are-Failing-2026-Checklist.jpeg)
![3 Subtle Signs Your Diamond Is About to Fall Out [2026]](https://jewelryfixpro.com/wp-content/uploads/2026/02/3-Subtle-Signs-Your-Diamond-Is-About-to-Fall-Out-2026.jpeg)
I really appreciate this detailed insight into the importance of precision and proper tools in jewelry repair and engraving. I remember my early days trying to work with softer metals like silver, often frustrated by inconsistent results. It’s true—investing in quality equipment and taking the time to set up a proper workspace makes a huge difference. One tip I found helpful was using a flexible shaft rotary tool for intricate work, which gave me better control and reduced fatigue. I’ve also learned that good lighting and magnification are often overlooked but essential for seeing tiny details clearly. From your experience, what are some common mistakes beginners make when choosing their tools, and how can they avoid these pitfalls? I believe that mastering patience and proper technique really elevates our craftsmanship, turning basic repairs into personal masterpieces. Looking forward to hearing others’ suggestions and experiences on building an effective toolkit for long-term success.