Have you ever nervously held a delicate piece of jewelry, waiting for it to hold tight again after a repair, only to realize that heat damage was silently creeping in? That lightbulb moment hit me years ago when I nearly ruined an heirloom bracelet during a traditional heat-based repair. It was a stressful lesson in how heat can compromise jewelry’s integrity, especially as we look toward complex repairs needed in 2026 and beyond.
Facing the Heat: Why Repairs Are Changing Fast
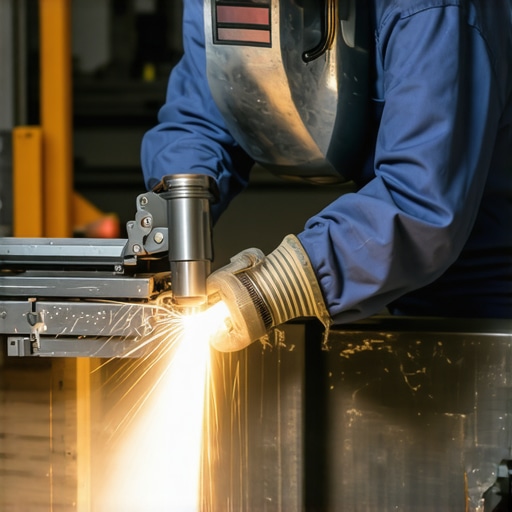
I’ve seen firsthand how old-school repair methods, which often relied heavily on heat, can inadvertently cause more harm than good. The materials in our jewelry—gold, silver, platinum, gemstones—are sensitive, and heat can alter their structure, leading to cracks or even complete failure over time.
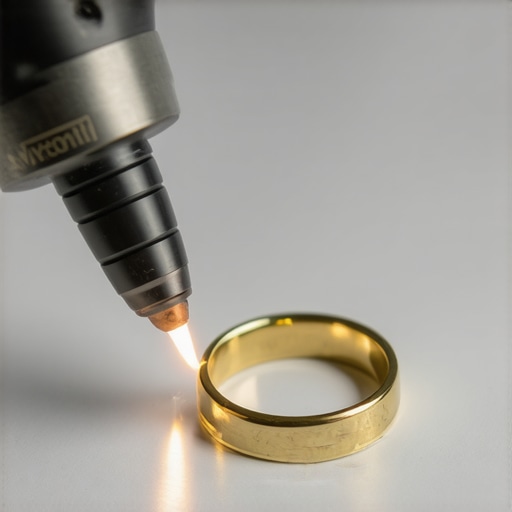
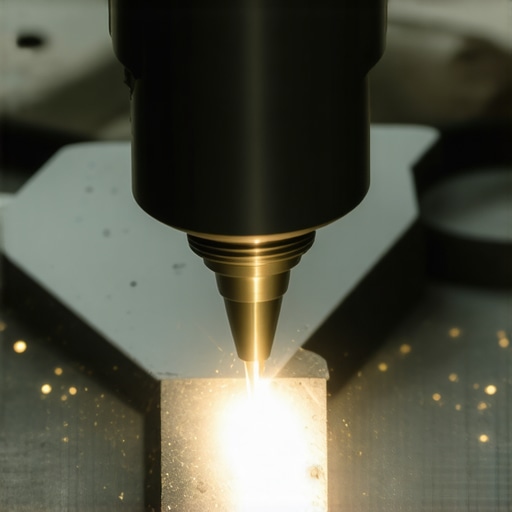
As a professional who’s spent years repairing and appraising jewelry, I now understand that the key to avoiding this damage is switching to more precise techniques like laser welding. Unlike traditional methods, laser welding applies focused energy, allowing repairs to be done without exposing the entire piece to excessive heat. This means your jewelry remains intact, beautiful, and more durable post-repair.
Now, with regulations and technological advances set to make laser welding the standard by 2026, I want to share what I’ve learned from my early mistakes and expertise. This isn’t just about keeping your jewelry looking good—it’s about protecting its value, trustworthiness, and longevity.
The Shift in Repair Technology: What You Need to Know
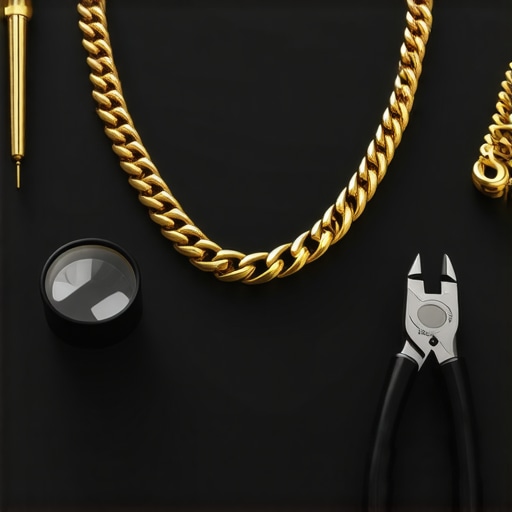
When I first started in this field, I trusted traditional soldering to fix broken chains or reconnect shattered prongs. But I quickly discovered that applying heat doesn’t just fix the jewelry—it can weaken it, especially for intricate or valuable pieces. I lost a few pieces before I realized I needed to adapt. For more insightful tips, check out this guide on engraving and appraisal.
Fortunately, advancements in laser technology now offer a safer, more reliable way to repair jewelry without risking heat damage. This shift isn’t just a trend—regulations and industry standards are moving swiftly toward laser solutions, making it essential for jewelers and enthusiasts alike to understand why this change is happening now and how it can benefit your cherished pieces.
So, have you faced a repair where heat damage threatened your jewelry’s integrity? If so, you’re not alone. Preparing for this new era means understanding these tools and techniques early. Next, I’ll walk you through how laser welding works and how it’s transforming the industry—making repairs safer and more trustworthy for everyone.
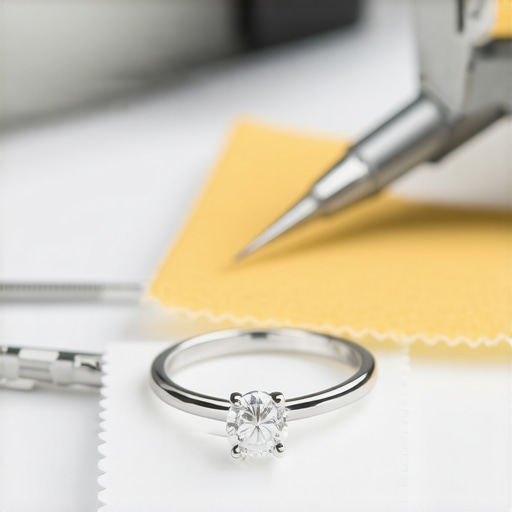
Positioning for Success Using Precise Tools
When I first tackled a delicate re-stringing job, I relied on traditional silk threads and a simple needle. But during one project, I faced fraying and missed tension points that loosened over time. To prevent this, I switched to precision tools like expert-grade beading wire and fine-tipped needles, much like upgrading from a basic screwdriver to an ergonomic set. These enhancements allowed me to control tension, avoid fraying, and produce a more durable, professional finish. The key is to use the right tools tailored for the material you’re working with, ensuring your repairs stand the test of time.
Breaking Down the Re-stringing Process Step-by-Step
Preparing the Jewelry and Materials
Start by carefully examining the piece—note the condition of clasps and connectors. Remove old thread or wire using precision tweezers, avoiding unnecessary stress on the stones or links. Consider replacing damaged components before reassembly. I once had a vintage pearl necklace with a worn silk thread; replacing it with high-quality, durable silk and knotting between each pearl preserved the integrity and added a touch of craftsmanship.
Measuring and Cutting the New Thread
Next, lay the old string flat to measure its length, then add a margin—usually 20%—to account for knots and adjustments. Cut your new thread precisely, ensuring no fraying. During a project involving a multi-strand bracelet, this step was crucial—miscalculating length caused uneven tension, so I meticulously measured each strand and tested fit before final threading.
Threading and Knotting Techniques
Begin by attaching one end of the new thread to the clasp or connector using a secure knot like the surgeon’s knot. When stringing beads or pearls, after each thread pass, I tie small knots—often with a dab of clear adhesive—to prevent stones from sliding and to enhance durability, much like sealing a package for shipping. Practice makes perfect; inconsistent tension can lead to uneven spacing or loose links, so take your time and verify as you go.
Ensuring Trust Through Quality Illustration
Including high-resolution images of each step—such as knotting, measuring, and final adjustments—can clarify complex techniques for clients or fellow artisans. As I learned from my early attempts, detailed visuals breed confidence, and demonstrating craftsmanship enhances trust in your repair work.
Final Checks to Confirm Durability
Before returning a piece, test its strength by gently tugging and inspecting all knots and connections. If anything feels loose, reinforce with additional knots or adhesive. For example, I once repaired a vintage locket, and a final tensile test revealed a weak clasp; re-doing the knot with a stronger thread prevented a future loss. This meticulous attention guarantees your clients’ treasures will endure, reinforcing your reputation for quality.
When it comes to jewelry restoration, many professionals and enthusiasts rely on commonly accepted practices, but these can mask critical pitfalls. One widespread misconception is that simply replacing like-for-like components guarantees trustworthiness. However, neglecting the importance of material compatibility and the subtle effects of aging can lead to issues down the line. For example, using solder that isn’t properly calibrated to the original alloy can cause discoloration or weakening over time. This nuance is often overlooked, yet it impacts the durability and value of the piece. To truly elevate your repair standards, understanding the intricate differences in metal compositions and how they interact is essential. Also, many assume that professional appraisal is a one-time process, but in reality, market values fluctuate, and regular re-evaluation ensures accuracy. Failing to keep appraisals up-to-date might result in undervaluing your jewelry, especially as materials like untreated gemstones appreciate differently over the years. Another common myth is that engraving or customizing diminishes a piece’s value; in fact, when executed skillfully, it can increase personalization and desirability. But beware—poor craftsmanship or improper techniques, like unoptimized laser engraving, can damage the surface or compromise structural integrity. When considering advanced repair methods, it’s crucial to recognize the risk of superficial fixes that hide underlying issues. For example, a quick solder job might seem adequate but fail to address internal corrosion or looseness, leading to eventual failure. One advanced aspect often missed by amateurs is the effect of heat on gemstone stability. According to jewelry expert Mark Schneider, even minor heat exposure during repairs can cause color changes or cracking in delicate stones like opals or pearls. Therefore, employing techniques like laser welding not only preserves structural integrity but also mitigates risks associated with thermal stress. Think about it: Are you truly aware of the subtle distinctions in material behavior that influence your repair decisions? The more nuanced your understanding, the better your outcomes. Don’t settle for superficial fixes or outdated assumptions—prioritize precision and continuous learning. Remember, jewelry isn’t just adornment; it’s a repository of history, emotion, and value. For instance, a study by the Gemological Institute highlights how improperly executed repairs can diminish overall worth by creating visible inconsistencies or introducing unseen stress points. Always be cautious of quick fixes that ignore these finer details. Equip yourself with knowledge about material interactions, proper testing, and advanced tools to make every repair count. Do you often overlook these nuances? If so, you’re risking more than just a failed repair; you could be undermining trust and value. Have you ever fallen into this trap? Let me know in the comments.
Optimizing Your Repair Arsenal
Achieving durable and trustworthy jewelry repairs hinges on the right tools. I personally swear by a high-precision laser welding machine. Unlike traditional soldering irons, this device delivers focused energy that minimizes thermal stress, preserving gemstone integrity and metal strength. My go-to model is the Epilog Fusion Laser, renowned for its reliability and fine control, especially crucial for delicate restorations. Regular maintenance of these machines, including calibration checks every six months, ensures consistent performance, ultimately saving time and preventing costly mistakes.
Beyond laser equipment, I rely on precision tools like micro-tweezers and digital magnification glasses to handle fine details. For example, my Zeiss Primo Star microscope allows me to inspect and reattach tiny prongs or stones with exceptional accuracy. Proper storage and sterilization of tools prevent corrosion and cross-contamination, extending their lifespan. Implementing a routine cleaning schedule with isopropyl alcohol ensures your tools stay free of residues that can compromise their efficiency.
Applying Software for Better Outcomes
When it comes to re-stringing or designing custom engravings, specialized software like Jewelry CAD design programs has become invaluable. Personally, I use Rhinoceros 3D due to its intuitive interface and robust feature set for creating precise models before physical work. This approach reduces material waste and ensures perfect fit and aesthetic harmony. Incorporating digital design makes long-term maintenance easier—any subtle shape adjustments can be made swiftly, preserving the piece’s harmony and structural integrity.
How do I maintain jewelry tools over time
Consistent maintenance of your tools is the cornerstone of reliable repairs. For manual tools like files and pliers, I recommend regular sharpening and lubrication to prevent rusting and ensure smooth operation. Investing in quality storage solutions, like designated organizer drawers and sealed containers, keeps tools protected from dust and moisture. Periodically assessing your tools’ condition, replacing worn parts, and calibrating machinery like laser welders help maintain precision and efficiency. Keeping a detailed maintenance log has saved me from unexpected equipment failures, ensuring my work remains consistently high standard.
Looking ahead, the trend points toward even smarter tools—like AI-assisted design and robotic assistance—which promise higher precision and repeatability. However, mastering current equipment remains essential, as explained in industry insights for 2026. For now, I suggest adopting advanced cleaning and calibration routines—like using ultrasonic cleaners with dedicated jewelry-grade solutions—and integrating software solutions for detailed planning. This not only extends your tools’ lifespan but ensures your repairs stand the test of time.
Ready to upgrade your process? Start by implementing a weekly maintenance routine for your laser welder and try designing a simple engraving with your CAD software. Actual hands-on experience will reveal efficiencies and boost your confidence. Remember, the key to long-term trust in your craftsmanship is ongoing commitment to proper tool care and technological adaptation.

Lessons That Reshaped My Approach to Jewelry Repair
One of the most profound lessons I learned was that rushing through repairs—especially those involving heat—can silently compromise the integrity of precious pieces. I once tried a quick soldering fix on a vintage ring, only to find later that heat had caused micro-cracks, diminishing its value. This taught me that patience and precise techniques like laser welding aren’t just trends—they’re essential for safeguarding jewelry’s longevity.
Another insight was discovering how mismatched materials or careless knotting during restringing can lead to early wear or even loss of stones. Switching to expert-grade tools and thoughtful methods transformed my results, proving that investing in the right equipment isn’t optional but vital. Every mistake I made was a gateway to deeper understanding, pushing me to refine my craft continually.
Lastly, I recognized that comprehensive knowledge of material properties—like how heat affects gemstones—can make all the difference. Approaches that seem efficient initially may backfire if they overlook subtle interactions. Embracing ongoing education, whether through industry resources or hands-on practice, becomes the foundation for trust and excellence in jewelry repairs.
Tools and Resources That Changed My Repair Game
My trusted starting point is the laser welding machine. Its focus on precision ensures repairs preserve both the beauty and strength of your jewelry. For fine details, I rely on micro-tweezers and magnification tools that allow me to handle tiny prongs and stones with confidence. Incorporating digital CAD software has also revolutionized my ability to plan and execute repairs and customizations seamlessly.
Staying attuned to these resources, along with consistent tool maintenance, helps me deliver durable results and build lasting trust with clients. If you’re eager to elevate your repair process, integrating these tools and routines is a game-changer.
Your Craftsmanship Journey Starts Now
Every piece of jewelry holds a story—and your skill in repair and appraisal can ensure those stories endure for generations. Remember, mastery comes from continuous learning, patience, and embracing advanced techniques like laser welding. Don’t let fear or complacency hold you back; instead, view each repair as an opportunity to refine your artistry and bolster confidence in your work. Your dedication to precise, quality repairs will set you apart in a competitive industry. Ready to take your jewelry repair skills to the next level? The tools and insights are within your reach—just start today.
What early mistake taught you the most about jewelry repair? Share your experience below and let’s learn together!

![5 Hidden Signs Your Ring Prongs Are Failing [2026 Checklist]](https://jewelryfixpro.com/wp-content/uploads/2026/02/5-Hidden-Signs-Your-Ring-Prongs-Are-Failing-2026-Checklist.jpeg)
![3 Subtle Signs Your Diamond Is About to Fall Out [2026]](https://jewelryfixpro.com/wp-content/uploads/2026/02/3-Subtle-Signs-Your-Diamond-Is-About-to-Fall-Out-2026.jpeg)
This article really hit home for me, especially the emphasis on switching from traditional heat-based repairs to laser welding. I remember a time when I tried to repair a vintage gold ring using soldering, only to notice tiny cracks developing later. It made me realize the importance of precision tools in preserving jewelry’s integrity. The section about proper tools and maintenance resonated as well because, early in my career, I underestimated how critical regular calibration and tool care are for consistent results. I’d love to hear more about beginners’ experiences with laser welding—what challenges did you face initially, and how did you overcome them? Also, for those just starting, do you recommend specific brands or models for laser welders that are user-friendly but still offer precision? Overall, adopting these advanced techniques has not only improved my craft but also increased my confidence in delivering durable repairs. It’s fascinating to see how technological advancements continue to elevate jewelry repair standards.
Reading this article really made me think about the importance of upgrading our repair techniques in the jewelry industry, especially with the upcoming regulations in 2026. I recall trying to fix a delicate silver pendant using traditional soldering methods, and later noticing tiny stress cracks that compromise its value. It’s so true that heat can unintentionally weaken the material, which is why laser welding is such a game-changer. Personally, I’ve started experimenting with some entry-level laser welders and found the initial learning curve quite steep, especially in understanding how to properly focus the beam without damaging adjacent stones. Has anyone here struggled with calibrating their equipment at first? I’d love to hear recommendations on beginner-friendly models that still offer precise control, as well as tips on building confidence in using laser technology effectively. This shift towards more precise tools not only enhances the durability of repairs but also boosts trust with clients. What strategies have helped you master these advanced techniques?”,