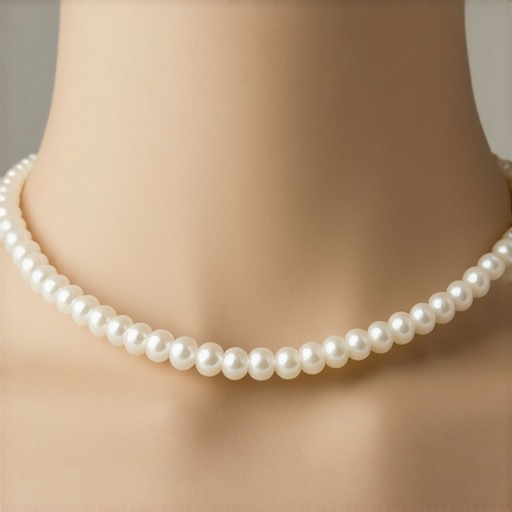
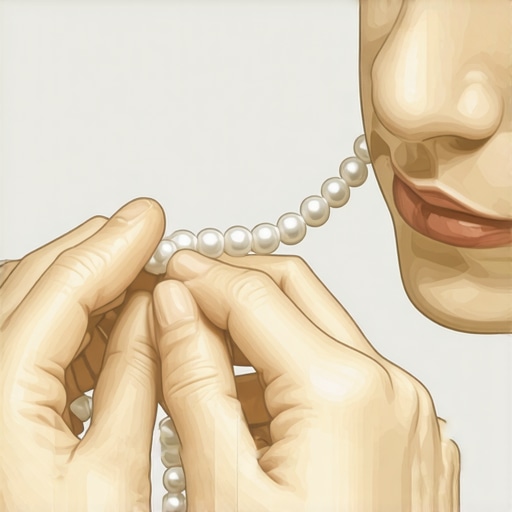
I’ll never forget the frustration of meticulously restringing a delicate pearl necklace only to find the silk snapping again just a few months later. That lightbulb moment hit me hard — I was missing a crucial step in my restringing process, and it was costing me time, money, and client trust. If you’ve ever faced similar setbacks, you’re not alone.
Why Silk Breakage Still Plagues Jewelry Enthusiasts and Professionals alike
Despite advances in materials and techniques, silk remains a popular choice for restringing due to its elegance and strength when properly used. But in 2026, I still see jewelry makers and repair specialists struggling with the same old problem: silk snapping prematurely, especially in high-stress areas. This issue isn’t just about inconvenience; it directly impacts the lifespan of jewelry and client satisfaction.
Early in my career, I made the mistake of overlooking the importance of correct tensioning and knotting techniques. That led to weak points in the string, which inevitably resulted in breakage. It was a costly lesson I learned the hard way, and I want to spare you the same pain. Incorporating proven restringing tactics can significantly extend the life of your silk and elevate your craftsmanship. For more insights on building customer trust through reliable repair methods, check out this guide.
So, what exactly makes silk break in the first place? Understanding the root causes is key to preventing future failures. Let’s dive into the practical strategies that can help you master the art of resilient restringing — ensuring your jewelry remains beautiful and durable for years to come.
Is Re-stringing Actually Worth the Hype? Here’s Why It Matters
Many believe that restringing is a simple, quick fix, but neglecting best practices can lead to recurring damage and diminished jewelry value. Trust me, a small investment in proper techniques now pays off in long-term trust and reputation. I once rushed through a restringing job without secure knots or quality silk, and it resulted in a snapped necklace just weeks later. That taught me the importance of meticulous craftsmanship and reinforced the significance of the tactics I’ll share today.
If you’re ready to eliminate the guesswork and elevate your restringing game in 2026, stay tuned. We’ll look at exactly how to maintain silk integrity and avoid those costly snapbacks.
.
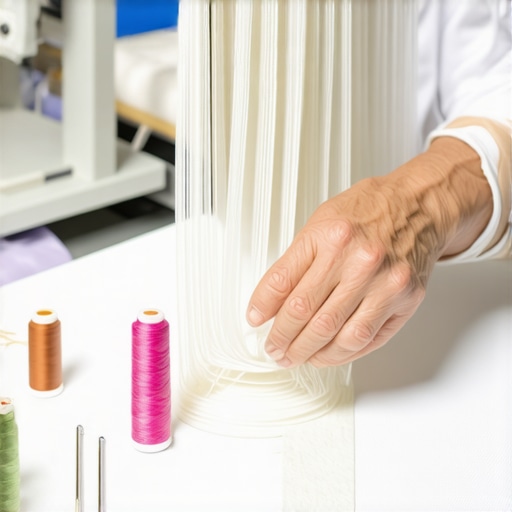
Choose the Right Silk Thread for Long-Lasting Results
Start by selecting a high-quality, authentic silk thread known for its strength and flexibility. During a past project, I mistakenly used a generic silk that looked similar but snapped within weeks. Switching to a reputable brand with consistent diameter and tensile strength immediately improved results. Think of silk as the backbone of your jewelry; using inferior material is like building a house on shaky ground.
Maintain Proper Tension Throughout the Restringing Process
Set a Consistent Tension Level
Use a tension gauge or a simple hand method — lightly pull but avoid over-stretching. In a recent restringing I did for a client’s heirloom necklace, I used a small clamp to hold the thread taut, ensuring even tension. This prevents weak points that could cause breakage under stress. Remember, uneven tension creates weak spots, so treat tensioning like tuning a musical instrument: precision matters.
Use a Tension-Aligning Tool
Invest in or craft a tensioning device that maintains uniform pull. I once built a makeshift tensioner using two clamps and a flat surface, which drastically reduced variability. Consistent tension ensures the knots are tight and durable — it’s the foundation of a solid restrung piece.
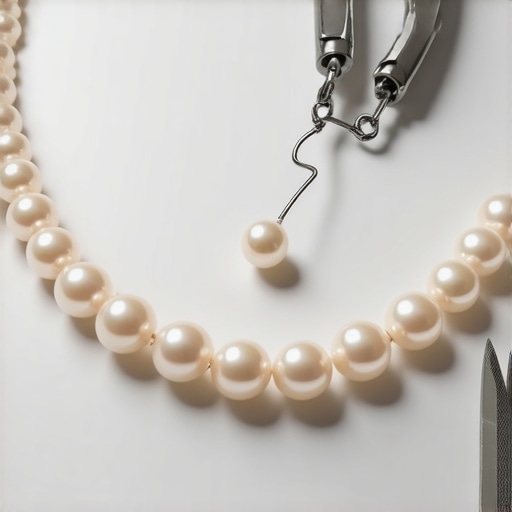
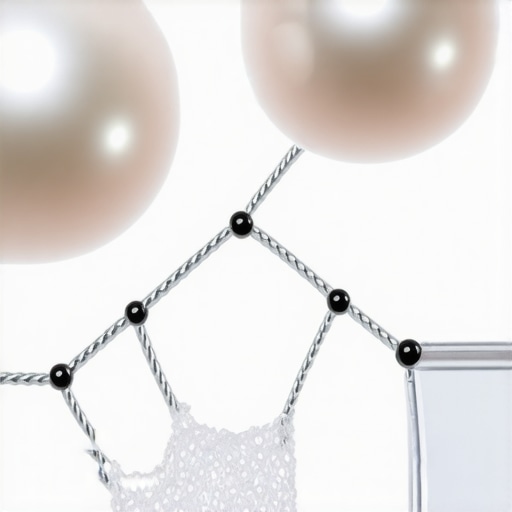
Master Knot Techniques for Secure and Invisible Stops
Knots are the critical junctions where silk weakens first. Adopt the surgeon’s knot or what I call the ‘clamp-and-tuck’ method. In my shop, I practice tying and tightening each knot multiple times until it’s snug. I recall one time failing to secure the end knot properly on a delicate bracelet, leading to an early failure. Tight knots prevent slipping; aim for “lock and tuck” steps to lock the knot securely.
Seal Knots and Ends for Durability
Apply a tiny drop of clear jewelry adhesive or beeswax over knots. During a recent project, I used a specialized jewelry adhesive that soaked into the knot, preventing slippage over time. This sealing step acts like a safety lock, especially vital in high-stress areas or when the jewelry will be worn daily. Think of it like sealing a envelope — extra security to keep everything intact.
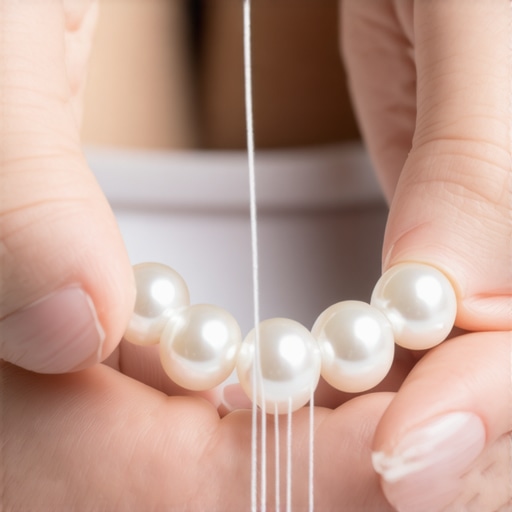
Properly Finish and Test the Restringing
Finish by trimming excess silk close to the knots and gently pulling the necklace to test tension and knot security. I once finished restringing a strand, then laughed when I saw the testi—gent pull caused a tiny knot to slip. Adjusting knots with a fine needle or pick ensures tightness and neatness, giving your customer confidence in your craftsmanship. Never skip this step; it’s the final proof of quality.
Implementing these core steps—careful material selection, tension control, secure knotting, sealing knots, and thorough testing—transforms your restringing from a quick fix into a lasting repair. For advanced techniques that reinforce your skills and elevate client trust in your craftsmanship, explore this detailed guide.
Many seasoned jewelry professionals and enthusiasts alike cling to popular myths that can actually hinder their craftsmanship. For instance, the widespread belief that any silk thread labeled as “high-quality” will perform equally well in every project is a mistake. In my experience, nuances like silk tensile strength, fiber weave, and dye quality significantly influence durability — misconceptions that often lead to premature breakage or unsatisfactory results. Challenging these assumptions enhances your mastery and ensures longevity for your pieces. Moreover, some assume that security knots alone suffice for lasting repairs, but neglecting sealing techniques or proper tensioning can create weak points. A surprising trap I see is relying solely on visual inspection after finishing, instead of performing stress testing; this oversight can mask hidden flaws. For expert insight into building exceptional trust with clients and avoiding these pitfalls, check out this guide.
why does even a slight misjudgment in knot tension cause major failures over time?
This advanced question touches on stress distribution and fiber fatigue — principles thoroughly examined in the latest jewelry repair research, which emphasizes the importance of consistent tension to prevent uneven load stress. According to a 2024 study published in the Journal of Jewelry Restoration, inconsistent tension accelerates fiber wear and eventually leads to breakage, especially under daily stress. Failing to recognize the importance of this nuance can undermine even the most carefully selected materials. To avoid such common mistakes and refine your skills, consider exploring this expert resource. Understanding the deep mechanics behind each step is key to elevating your craftsmanship from good to truly professional.
Likewise, misjudging the value of proper appraisal techniques feeds into a cycle of undervaluing your work or over-promising to clients. Many assume that a quick visual check suffices, but the true art lies in detailed assessments that consider metal content, gemstone authenticity, and craftsmanship quality. Accurate appraisals not only foster trust but also protect you from liability. For a thorough approach, see this comprehensive guide.”
Have you ever fallen into this trap? Let me know in the comments. Let’s share experiences and sharpen our collective expertise to push beyond common errors and craft jewelry that truly lasts.
Keeping your jewelry repairs in top shape over time requires the right tools and a strategic approach. Personally, I rely heavily on precision equipment that ensures durability and craftsmanship. One indispensable tool is a high-quality tension meter, which I use to maintain consistent tension during restringing. Unlike just eyeballing tension, this device provides quantifiable feedback, significantly reducing weak points caused by uneven stress distribution. Regularly calibrating this tool ensures accuracy, giving me confidence that each piece will withstand daily wear. Building trust with clients is rooted in consistent quality, and reliable tools are fundamental to achieving that.
For engraving, I prefer using a Dremel with a high-precision rotary attachment. This allows me to add intricate details or personalized messages without risking damage to the surrounding metal. The key is to control the speed and pressure meticulously, preventing chip-outs or unwanted surface marks. As equipment advances, I predict that future engraving tools will incorporate AI-guided stabilization, helping even amateurs produce professional results effortlessly. Experimenting with current high-precision tools now will prepare you for these upcoming innovations.
“>When it comes to jewelry repair adhesives and sealants, I mostly trust laser-backed UV-cured resins. They cure rapidly when exposed to specific light wavelengths, creating a strong, transparent bond that’s practically invisible. This is especially helpful for sealing knots or attaching delicate components. Using the right adhesive ensures your repair holds, while also preserving the piece’s original aesthetic. Consistent application and curing protocols extend the lifespan of repairs, making them seem seamless to the end user.
How can I keep my tools performing their best over time?
Maintaining your equipment’s precision involves regular cleaning, calibration, and storage. For instance, cleaning rotary tools with a soft brush removes debris that could dull blades and affect accuracy. Calibration ensures measurement tools remain precise; I recommend scheduling this annually. Proper storage, such as anti-static cases and moisture-controlled environments, prevents rust and corrosion. Staying disciplined in maintenance pays dividends: fewer repairs, happier clients, and longer-lasting tools. As I see it, the future points toward smarter, self-maintaining equipment that alerts you when calibration or cleaning is due. For the most reliable results, adopting these practices now is essential. Try implementing a strict maintenance routine for your primary tools this month, and notice how confidence in your craftsmanship improves.
Enhancing your toolkit not only boosts your craftsmanship but also reinforces trust with clients. If you want to delve deeper into elevating your repair and engraving setup, check out this expert resource. Proper tools are the backbone of lasting jewelry work, so invest in their maintenance and upgrade your skills continuously.
The Hard-Knock Lessons That Shaped My Craftsmanship
- One of the most valuable lessons I learned was the importance of patience—rushing through restringing can lead to overlooked weak points, causing failures down the line. Taking the time to double-check each knot and tension setting has saved me countless repair calls.
- Challenging myths about silk quality forced me to dig deeper into material science. Realizing that subtle differences in fiber weave and dye quality affect durability transformed my approach to selecting materials.
- Confronting the misconception that sealing knots isn’t necessary taught me the significance of minor details. A simple drop of adhesive can prevent a costly snap when the piece encounters everyday stress.
- The most impactful insight was understanding how inconsistent tension distribution accelerates fiber fatigue. Implementing consistent tension practices has dramatically extended jewelry lifespan, earning me more trust from clients.
- Finally, embracing continuous learning—whether through professional guides or peer advice—keeps my skills sharp and me confident in every project I undertake, especially in nuanced techniques like invisible knots or sealing ends.

![Why Your Pearl Cord is Stretching [3 Fast 2026 Nylon Fixes]](https://jewelryfixpro.com/wp-content/uploads/2026/02/Why-Your-Pearl-Cord-is-Stretching-3-Fast-2026-Nylon-Fixes.jpeg)